Search This Blog

Showing posts with label sewing. Show all posts

Sunday, 2 April 2017

More Sorbettos


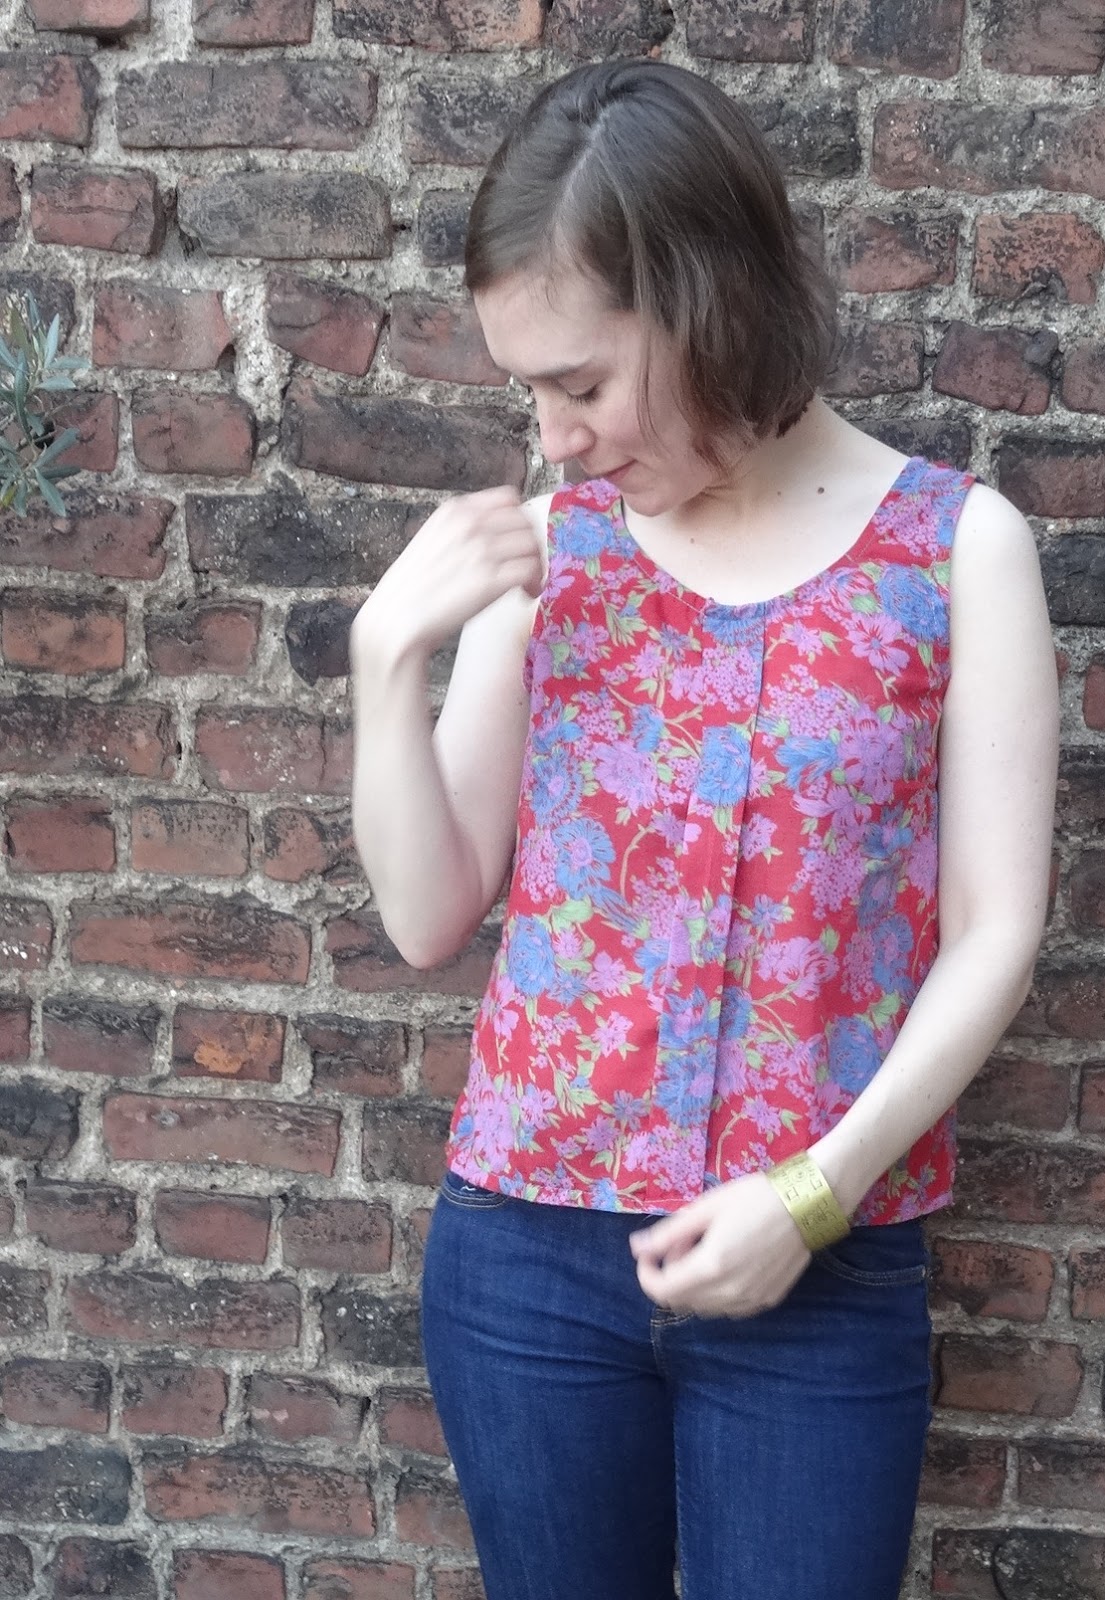
My go-to pattern when I feel like sewing something simple - and I'm getting quite good at it now after Sorbetto nr. 4! It's the second time I'm trying the pattern hack to add sleeves and I shortened them some more; I also took out the pleat in the front in the polka-dot version to vary a little bit. I was also thinking about adding a collar of some sorts but decided against it to keep it simple.

In a slightly ridiculous side note, I also finally figured out how to properly use bias tape. Yes, that's right, I've been sewing for 5+ years and for some reason never bothered to properly read the instructions on the bias tape... But now that I know how it works I like it even more.

The flowery print fabric is from Nepal and some kind of synthetic mix, maybe with some cotton, but most probably viscose. It's very light weight and I like the way it drapes. I wish I knew where I could get it here in Europe, they had an amazing variety of prints in the shops but I couldn't buy too much because of the limited size of my backpack. Any hints as to where to buy/order nepalese fabric are very welcome.

The other fabric with the golden polka dots is from Nani Iro's  "Pocho" collection. I was very excited to finally use it since  my friend brought it specially from Japan and I really like the texture of the double-gauze. Originally I had planend to keep it for something "special" but then again it's probably better to use it with a pattern that I know well to make fewer mistakes. And the result is definitely presentable and I hope I'll be using it as much as my previous Sorbettos.


Thursday, 15 September 2016

Lilou II


This dress has cost me so much nerves, I can't even start describing it. Or maybe, I'll just give it a try: to understand how much energy and willpower it has taken me to sew this dress you have to know that it took me almost two years to finish it!!

 After making my first Lilou in 2014, which went relatively fast, I really thought the second one wouldn't be a big deal anymore. I only wanted to add the lining to the bodice and that's it. But for some reason it all went wrong (as I already described in this blog post) and I was extremely demotivated with the whole project. I could only finish it by taking super-mini-baby-steps at a time, e.g. one day only to sew the hem, one day only to attach the lining to the bodice, etc.

The result is ok. It's better than expected after all the cursing and sweating but it's definitely not better than my first Lilou, which was what I had hoped for. Here are my main points of annoyance:

  • The lining. After I destroyed the first one I became so frustrated I just went for the toile that I had already made and used it as a lining. The fabric is cheap and flimsy - it works but it doesn't look great.
  • The hems. I cut the fabric a bit short and in order not waste too much at the hem, I used bias tape. Nothing against bias tape, it kind of saved my sanity in this case but it just doesn't fit the fabric very well. 
  • The inside seams. I tried to follow Tilly's instructions to fix the lining to the bodice and the skirt by hand but I utterly failed. I don't know how it's supposed to work but my guess is that I had too little seam allowance at the top of the skirt so there was no way I could slip the bodice fabric under it. I used bias tape (again) and got a semi-satisfactory result.
  • The zip. I was supposed to go for an invisible zip but it turned out very much visible. It's actually neither a bad invisible one nor a good visible one, I just somehow muddled through. 
  • The fit. It stills pinches the skin under my arms! I thought I had figured it out after the first dress but apparently, no. 
But there are also some things I like and I did actually wear it to a wedding in the end, feeling quite proud of this achievement in spite of all the cons. I like
  • The swinging skirt, really fun to dance in!
  • The fabric: still one of my favourites even though the print is actually faulty and blurred in some places
  • The pleats: bloody awful work to make them align with the bodice but it has paid off
I think the lesson I'm taking away from this project from hell is that I'm not that much of a sewing-person after all. Knitting, that's my thing! I envy all the amazing seamstresses and seamsters that can just sit down, follow the pattern instructions, and have a perfectly fitting garment. Yeah, I'm not like that. I might leave those ambitious projects for a while and only do some very simple stuff to keep me entertained and then I should REALLY invest in some sewing lessons. 

Thursday, 1 September 2016

Transformation Thursday: 1950s dress


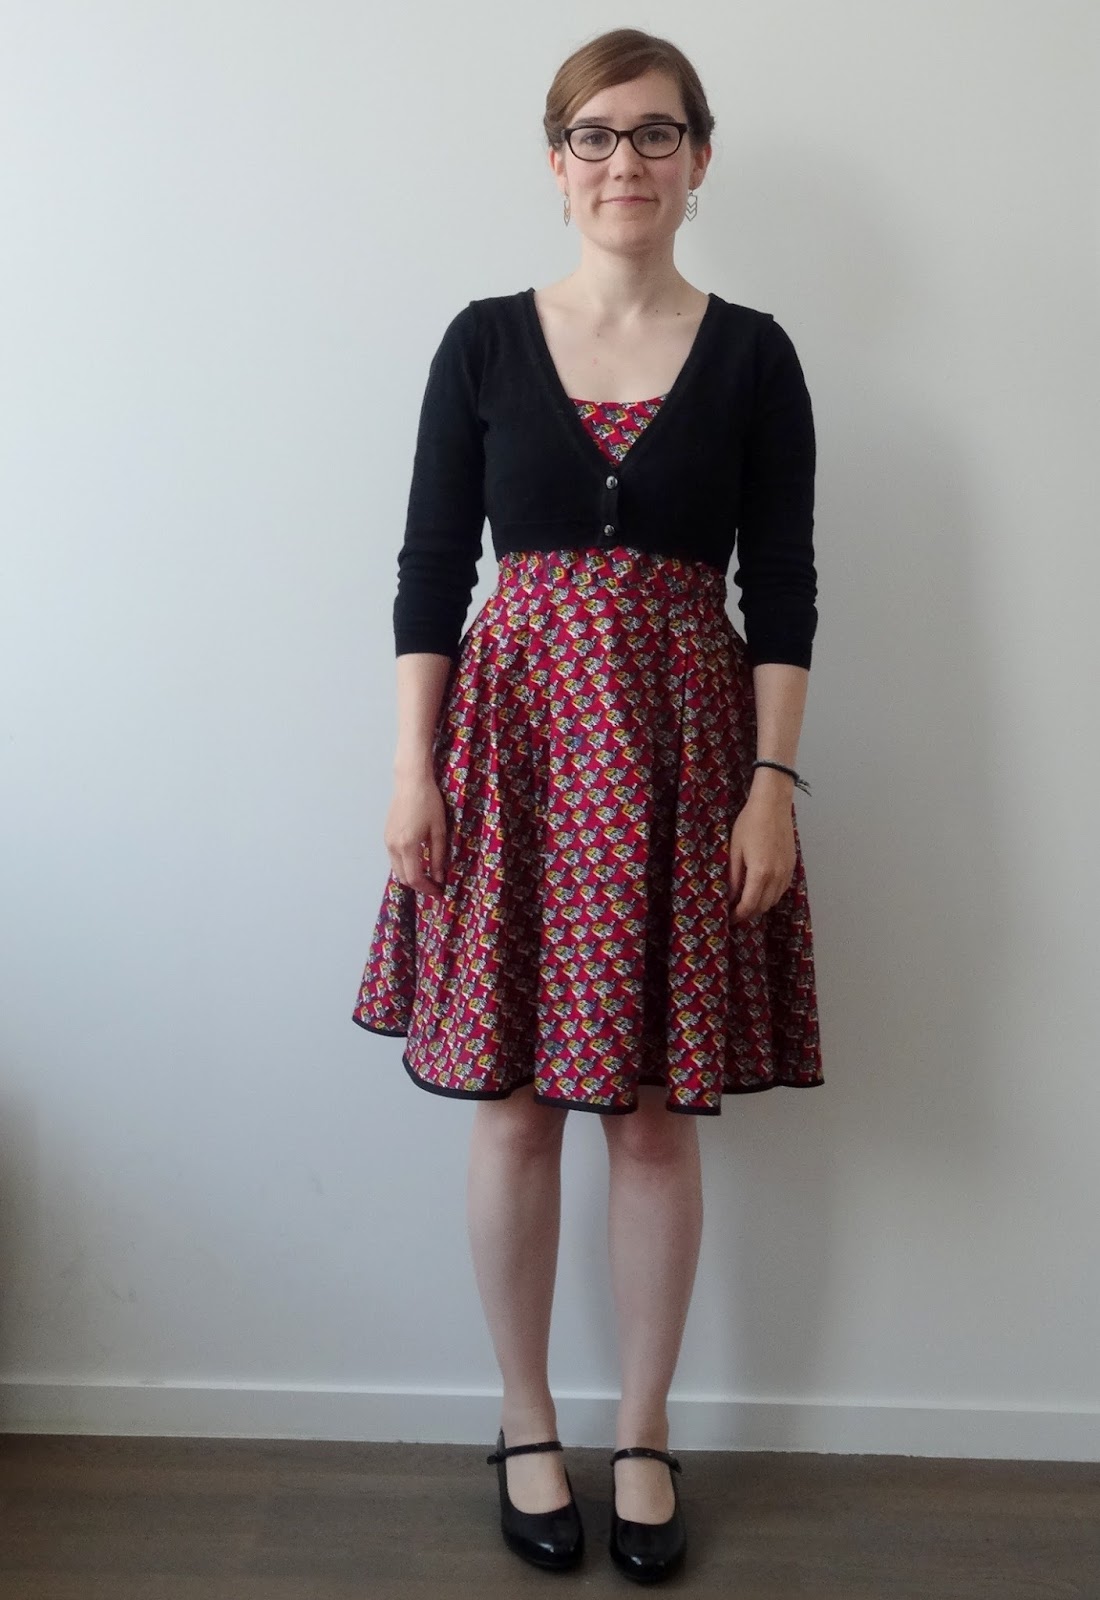
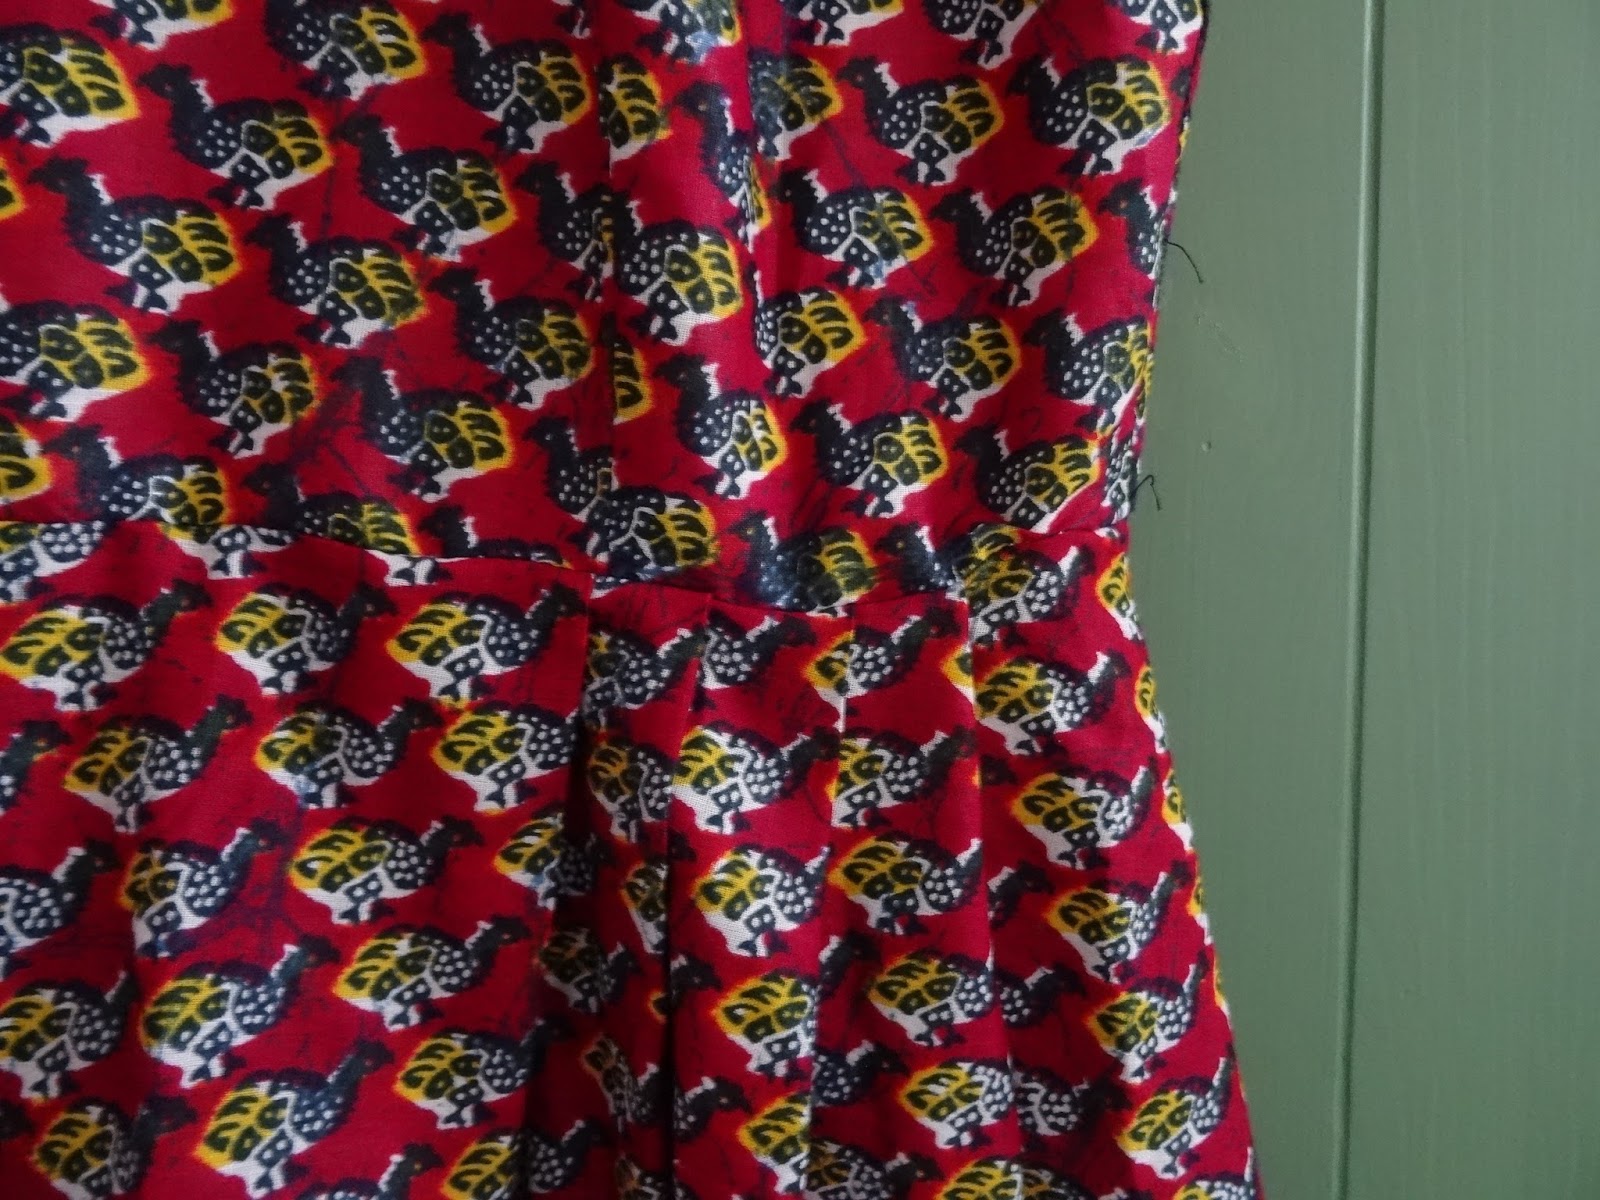
I found this amazing 1950s-style dress in a second hand shop in town (the best one in Bxl if you ask me. Already the third find I made and even though it's definitely more "vintage" than charity shop and this is also reflected in the price, the stuff is decent quality and they have a very good selection.). Isn't the print completely irresistable?! It reminds me of Nani Iro and a bit of Marimekko but the cut is just pure 50s and perfect for the late summer here.

As you can imagine, the fabric alone would have been enough to sell it to me but I also love the construction of the bodice, the button band, and the pockets. The best thing is: it's completely hand made! I suppose back in the day it wasn't so rare to make your own dresses so it probably shouldn't surprise me but it's so nice to wear something which is a few decades old and has hand-stitched hems probably by somebody who is dead by now. Ok, that sounds a bit tasteless but it's true!

But why am I posting this? Because, unfortunately, it was a bit tight around the boobs and the fabric doesn't stretch a millimeter I had to adjust the bodice and therefore made it into my "Transformation Thursday" category, yey. It's only a very small adjustment but a very useful one in case you also come accross a garment you really love but it's just a tiny bit too tight. Here's what I did:

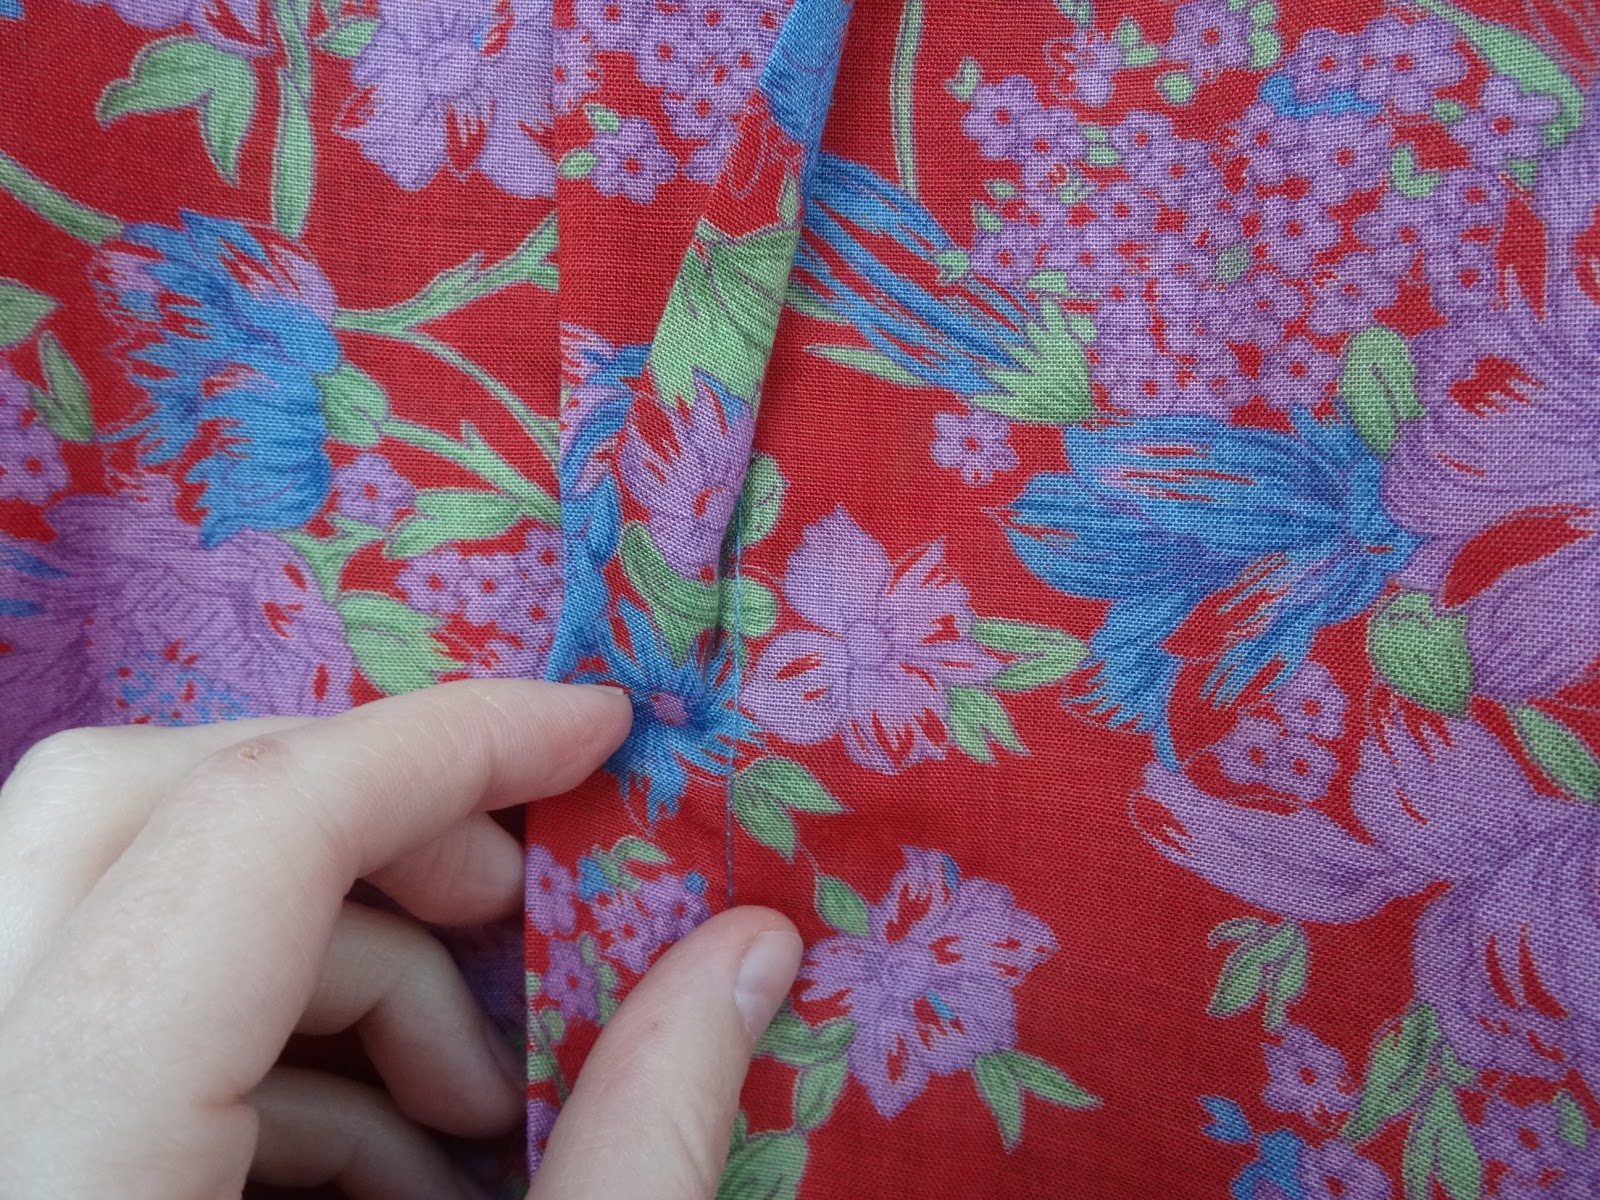
  • I ripped the side seams of the bodice and carefully detached the facing on the top (you can see the line where the stitches used to be in the close-up picture above)
  • I re-sewed the side seams with more "give" and also re-attached the facing
  • I attached the facing to the bodice with blind stitching by hand, as it had been done before
  • I fixed some botched stitching on the side seams by hand
I was lucky that there was enough fabric in the seam allowance to do this, I will remember that for my next dress "just in case". And in hindsight, it would have been a better job if I had taken apart the bodice completely and detached it from the skirt. But that would have been a hell of a job so now it doesn't look perfect but it makes the dress wearable. Ready for some more Sunday picnics!


Thursday, 9 June 2016

Transformation Thursday: Embroidered top


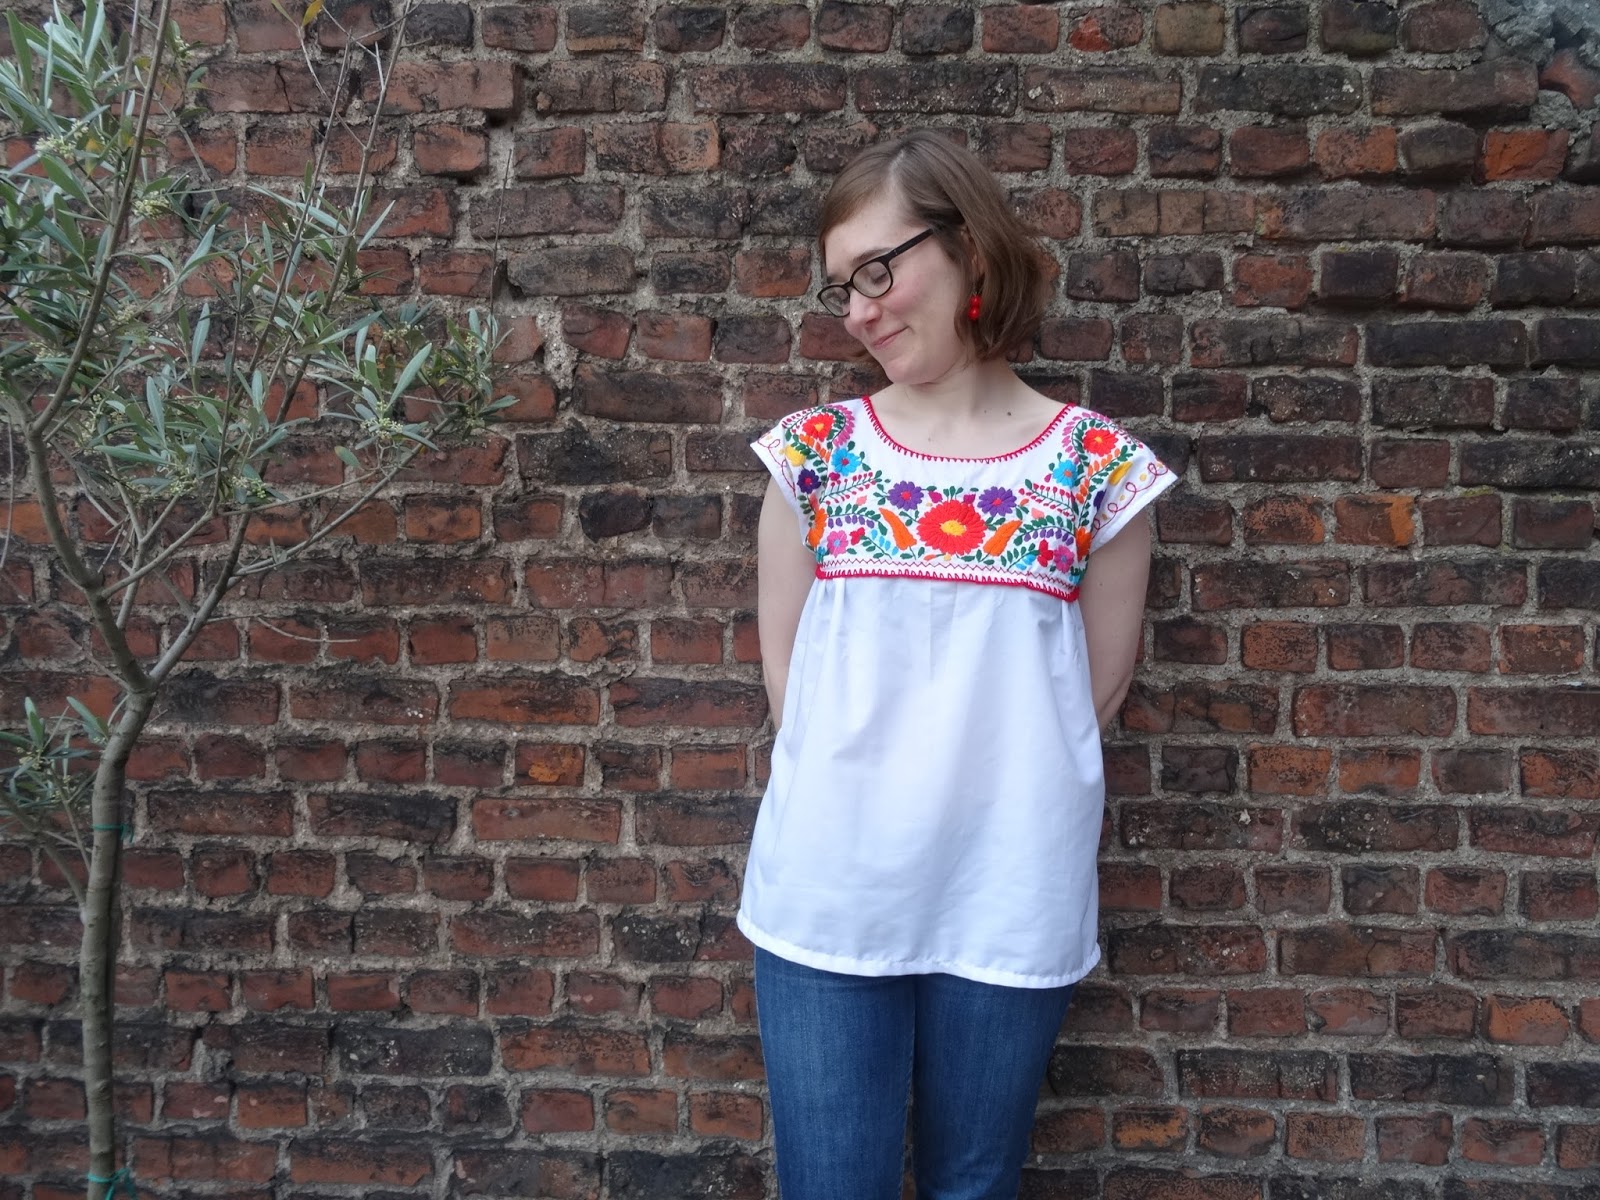
It's been a while since I had a good upcycling project but the second I saw this top at the thrift shop I knew this was a perfect candidate. I had been looking for a simlar top for ages and I love the embroidery (although I still can't decide if it's more South American or Eastern European style). The only issue: it was the size of a tent. But with a sewing machine at home there was a quick fix.

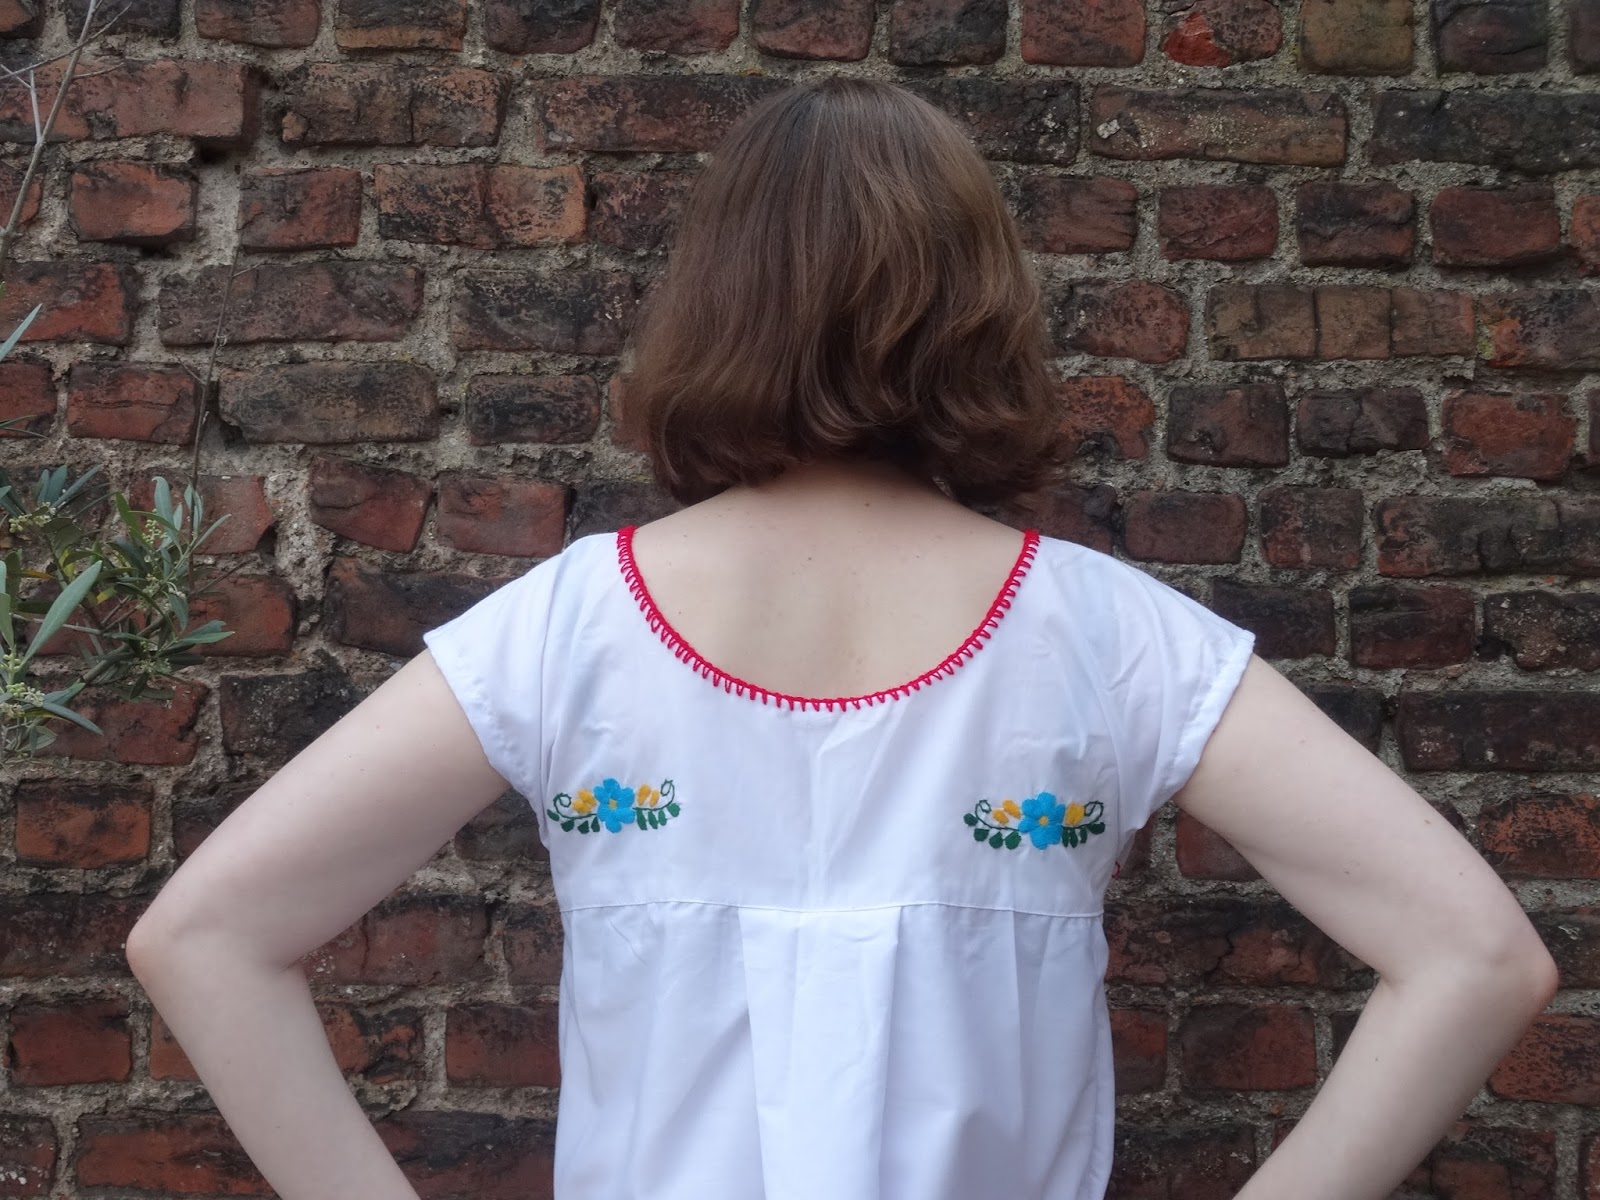
I wanted to keep the embroidered panel in one piece and make the top shorter. The easiest solution was to just take the sleeves off and make a kind of tunic instead and I was lucky enough that the width was just right. I unpicked all the pieces and also re-pleated both front and back parts. In hindsight I'm not a big fan of the pleat in the back but the distribution of the fabric is ok. 

The blue flowers on the back are such a nice detail and I'm happy that I could keep them in place! Likewise, I saw this little figurine (see the second picture below) at the thrift shop and when I asked how much it cost, they actually gave it to me for free. Yey, such a good week!

Stage 1: The original shirt


 Stage 2: Disassembling


 Stage 3: The new top


Friday, 13 May 2016

Sorbetto(s) 1 and 2


As I mentioned in my last sewing-related post, I've become a little frustrate with my sewing projects lately. The last Lilou didn't turn out the way I was hoping for, hence it's still lying unfinished next to my sewing machine (only the zip is missing).

Then I has some threading troubles that were driving me to the edge of insanity (the first few stitches would be fine, then suddenly the upper thread would lose all tension and create loops on the underside of the garment). I finally figured out that it was because of the thread (thanks Emily!), even though I had previously used it and it was fine! Somehow this threw me back to my first sewing experience in school where I ended up crying through the lesson because this machine did not want to cooperate - I think I might have mentioned this traumatising episode before.

Anyhow, the bottom line is that I decided to take a step back and first make some eaiser projects again before taking on something more complex; I think I simply overestimated my abilities in the case of the second "Lilou". So, back to an old-time favourite, the Sorbetto top! I had actually sewn my first one (in black) a couple of years ago but never blogged it so here it is together with the latest version with sleeves and flower print.

I have worn my black Sorbetto a lot so it already looks a bit worn down but I love the fit and also the detail with the ribbon, a souvenir from Ukraine. For my second Sorbetto I added the sleeves (according to a pattern I found here) and I left out the pleat in the centre. However, due to my stupidity when cutting out the pieces I didn't have enough fabric to cut from the fold so I had to cut two separate pieces, hence the white lacy ribbon in the centre - it's covering up the seam.

I still love the pattern and this success has given me back a bit of confidence. I want to be 100 % sure I don't mess it up when I start cutting into my Nani Iro treasures...

Friday, 6 May 2016

New fabric!


Even though I'm taking a bit of sewing brak at the moment this has not stopped me from buying more fabric. And, thanks to my amazing friend Ilaria, my stash has now been enrichened with two super-soft and amazing Nani Iro fabrics, straight from Japan! I'm still figuring out what to make but I'm very excited to plan with the different patterns and imagine what it will look like when finished.

With the Chambray I want to make another "Miette", this time with pockets, and for the other ones I haven't got anything specific in mind yet. I did notice that I definitely favour polka dot patterns but that was a purely unconcsious bias.